How to use the Vipon Product Promotions Dashboard
Your product promotions dashboard is going to become your best friend when being an active part of the deals community. It’s the place you’ll manage and keep track of the products you’ve requested and are excited to try out.
In this guide we’ve broken down all the important components to get you up to speed with navigating your dashboard with ease. Spend more time finding and buying cool products and less time figuring out the details.
So, let’s jump into it. We’re going to be covering three areas in your Using the Dashboard Roadmap.
- How do I access the dashboard?
- What do I use the dashboard for?
- Your key components of the dashboard?
How do I access the dashboard?
Accessing your dashboard is quick and convenient as a Shopper.
- Sign in to your Shopper Account.
- Find the Deal Requests button.
- You’ll be brought to your Product Promotions Dashboard.
Check out the detailed write up below for a run through of the steps you need to take.
Your dashboard is your central point of contact as a Shopper. So to access your dashboard, you’ll need to first make sure you’re signed into your Shopper account with Vipon.
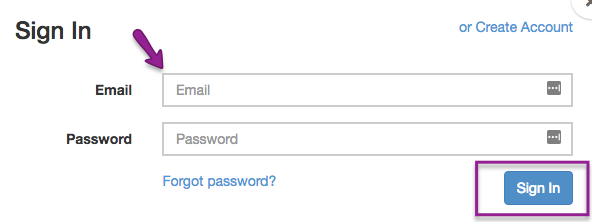
You’ll find the login area located in the top right menu bar. Click ‘Shopper Sign In’ which will bring up a pop up. Enter the email and password you used to sign up and you’ll be logged into your account.
After entering your login details, you’ll now be successfully logged into your Account. (You can login and logout at anytime by clicking the Account button in the top right hand corner. This also indicates that you’re successfully logged in).
From there click ‘Deal Requests’ – that’s the button that’s going to bring you to your product promotions dashboard.
Your dashboard will contain a list of products you have requested or been accepted for. If you have not requested any products, there will be no products under the ‘Deal Requests’ link.
What do I use the dashboard for?
The dashboard should be the first thing you check when logging into your Vipon account. As a shopper it’s the place you can keep track of all the products you’ve found and want to try.
Managing your products helps sellers get the products to you faster and keeps you an active member of our deals community.
Your product promotions dashboard should be used for the following things.
- Checking your pending product requests
- Accepting or declining vouchers that sellers have sent you
- Reaching out to sellers if you have any issues
- Checking any instructions sellers have left for purchase
- Reporting sellers if you notice something seems wrong
- Keeping track of how many vouchers you have used this month
- Marking items as purchased
- Finding your previously purchased items
We’ll dive into where to find these areas in the next section where we’ll cover the key components of your Dashboard.
Your key components of the dashboard
Your dashboard is designed to be a simple place to manage the cool products you’ve found in the deals community. There are several areas that you’ll use consistently as a top Shopper.
- Your voucher requests
- Your accepted products
- Seller contact details
- Seller instructions
- Report a problem
- Removing a product from your dashboard
- Declined for a product?
Here’s where all of these areas are located.
1. Your voucher requests
- You have a certain amount of products you can accept in a month. You can keep an eye on this information in the top section of your dashboard.The voucher area will list the amount of vouchers you can accept remaining and how many requests you can apply for.

2. Your accepted products
The products that you have been accepted for by sellers will appear in order in your dashboard. You can keep this organized by checking your dashboard daily and accepting the vouchers that appear.
You can tell if you’ve been accepted by checking two columns,
- The ‘Voucher’ column which will have – Accept Voucher or Decline Voucher.
- The ‘Status’ column which will have – Pending, Approved or Not Approved.
You will have three days after a seller accepts you to accept or decline the voucher. So keep your eyes peeled and check your dashboard regularly.
3. Seller contact details
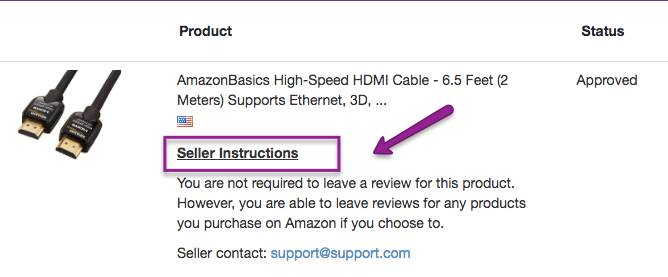
If you need to contact the seller you can find their contact details in two areas. The first is under the ‘Product’ column, under Seller Instructions.
The second will be the last column on the right.
You should contact the seller if you need to troubleshoot issues with buying the product.
4. Seller instructions
Sellers may occasionally have instructions relating to purchasing the product. You can find these details under the ‘Product’ Column.
5. Report a problem
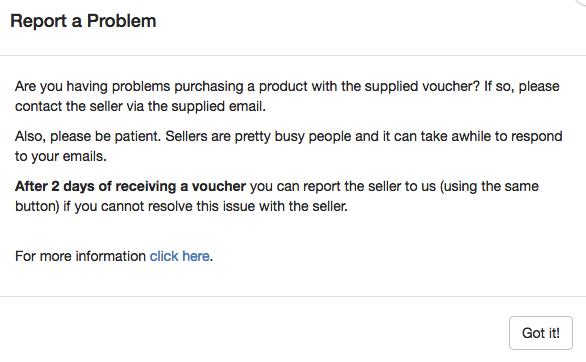
If you have an issue with a seller or their product that can’t be resolved, you can use the Report a problem function. This is located in the last column on the right.
6. Removing a product from your dashboard
After purchasing the item you’ll need to revisit your dashboard and click the ‘I’ve purchased this’. This will move the item to the bottom of your product list for 30 days from the day you’ve accepted the voucher.

7. Declined for a product?
You’ll see a ‘Remove Request’ button pop up which will allow you to remove the product from your dashboard. This allows you to quickly scan the products you need to take action for.
So there you have it, your quick guide to navigating your product promotions dashboard. It’s your place to work with dedicated business owners who are excited for you to try their products and find something new.


